Ink is typically the cause of your printer’s inability to produce black. As a result, since ink is a vital component of inkjet printers, it is a common problem. Checking the ink level and refilling it as necessary is a common solution.
You may have such problems even if the cartridge has enough ink. The hardware of the printer or the system to which it is connected may be at fault. Restarting the printer or the linked device may seem like a straightforward solution, but it may not always work.
As a result, you must attempt each fix until your issue is fixed.
Make The Printer Clean.
Your printer occasionally has printhead nozzle clogging, which prevents it from printing in black or any other color. The print output is also discolored or faded. You can either physically clean the printhead or use the printer settings to solve it.
The majority of printers offer a nozzle check function. Even though each printer manufacturer may have different settings, you can typically locate them under the Maintenance menu. If you see any gaps or missing lines after performing a nozzle check, you can clean the printhead. The printer settings are where you may accomplish this.
Similarly, to physically clean the printhead, gently pull out the detachable printhead as doing so forcibly could result in it breaking. After that, clean it with warm water or a liquid solution in a syringe. After cleaning it, let it completely dry out or use a paper towel to speed up the process before reinstalling it in the printer.
Make The Cartridges Clean.
The cartridge is another important factor contributing to your problem.
After being removed, it could be reinstalled improperly or with incorrect alignment. Therefore, be sure to install it correctly. Compressed air can also be used to remove any dust that has become lodged inside the cartridge.
You can even swap out the cartridge with a fresh one if you think it may be broken or otherwise useless. But, only use a genuine and printer-compatible cartridge or ink instead of a third-party one.
Activate The Printer Troubleshooter
You can use the printer troubleshooter on a Windows 10 computer to identify and resolve printer-related problems.
- To launch the diagnostic tool,
- To access the Settings app, press Windows + I.
- Go to Update & Security > Troubleshoot from the menu.
- Click on More troubleshooters in the right pane.
- Then, select “Run the troubleshooter” after selecting the Printer.
- After that, implement the suggested fixes and adhere to the on-screen directions.
Get In Touch with The Printer’s Maker
You still have the choice to get in touch with your printer maker if none of the aforementioned solutions work. You can get in touch with them by calling their phone support or via their website.
Similarly, you can read the printer’s handbook before you buy. The instructions are quite beneficial for resolving frequent problems. They also include fixes specifically for your printer.
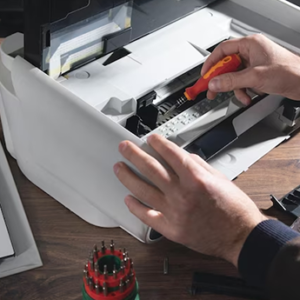
Printer Repair
If none of the aforementioned fixes succeed, there may be hardware problems with your printer.
In order to request a free repair or even replacement components from the manufacturer, first check the warranty term. If it hasn’t expired, check it first. Instead, as suggested, you can present it to a repairman who will replace the broken components.
On the other hand, if your printer is too old, you can consider buying a new printer.
Conclusion
If you are a resident of the USA and require help from a third party utilizing a Hitachi Printer. An appropriate replacement is the American A1 Repair Printer. A1 Repair Printer in The USA provides online and remote support for assistance with any Hitachi Printer. Calling the backup platoon and me in America is more than appreciated. Visit me soon! Hitachi Printer Repair Arizona and remote support can be obtained by calling (928) 514-2464.